Are you trying to create eye-catching animations or looking to improve your motion graphics? Whether you're a pro or just starting with Adobe After Effects, shortcuts can help speed up your workflow and make your life easier. If you're looking for some of the most essential shortcuts for Motion graphics, look no further! These are the shortcuts that I have found most helpful and continue to use daily.
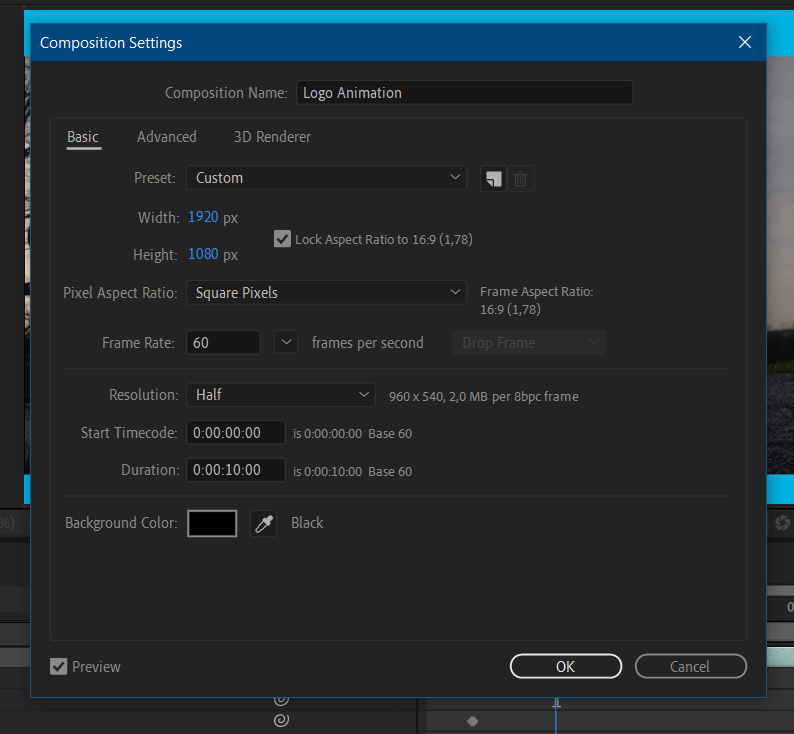
1- Composition Settings
ctrl/cmd + K
If you didn't get the total duration correct when you first created your composition. To change other properties, like the frame rate of your composition, or to change its width or height.

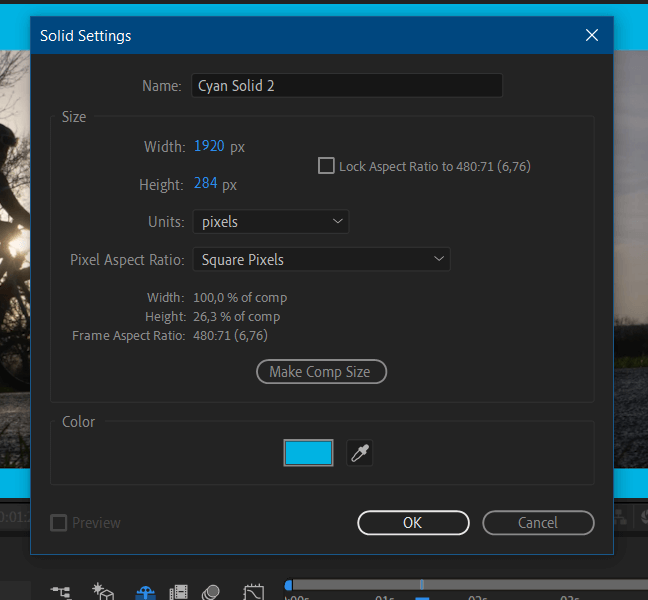
2- See Solid Properties
ctrl/cmd + shift + Y
If you are working with logo animations, maybe you created a solid, but now you don't like the colour of it. To change the colour of your solid, or other properties, hit this shortcut while selecting it.

3- Reveal the specific properties of an object:
P For Position
R For Rotation
S For Scale
T For Opacity (If you are thinking why T, "O" is used to Go to layer Out point)
4- Add keyframes for specific properties:
alt + shift + P
Adds 'Position' keyframe (Opt + P on Mac)
alt + shift + R
Adds 'Rotation' keyframe (Opt + P on Mac)
alt + shift + S
Adds 'Scale' keyframe (Opt + P on Mac)
alt + shift + T
Adds 'Opacity' keyframe (Opt + P on Mac)
5- Center your selected asset(s) to the frame
ctrl/cmd + Home
If you mixed up the position of your layers and you are looking to centre them, this combo will centre your anchor point in your composition.
6- Travel frame by frame
PgUp Go backward 1 frame
PgDn Go forward 1 frame
An alternative to this can be holding ctrl/cmd while pressing ← or →.
Yes, After Effects tends to have three differnt ways to achieve the same result.
7- Travel keyframe to keyframe
J & K
Go to previous or next keyframe across the property (or properties) revealed (It also works for previous/next marked)
8- Travel back or forward TEN frames.
shift + PgUp Go backward 10 frames
shift + PgDn Go forward 10 frames
Essential for intro/outro animations
9- Show only properties with keyframes or expressions
U
In the case of working with templates, and you would want to change a specific property, but you don't know which one, just hit "U" to reveal that property with its keyframes
10- Easy ease keyframes
F9
With Motion blur enabled, if you want to create animations with a smooth feel. After that, you can go into the graph editor and push and pull the in and out handles.
11- Add current composition to render queue
ctrl/cmd + M
Let's get that render done!

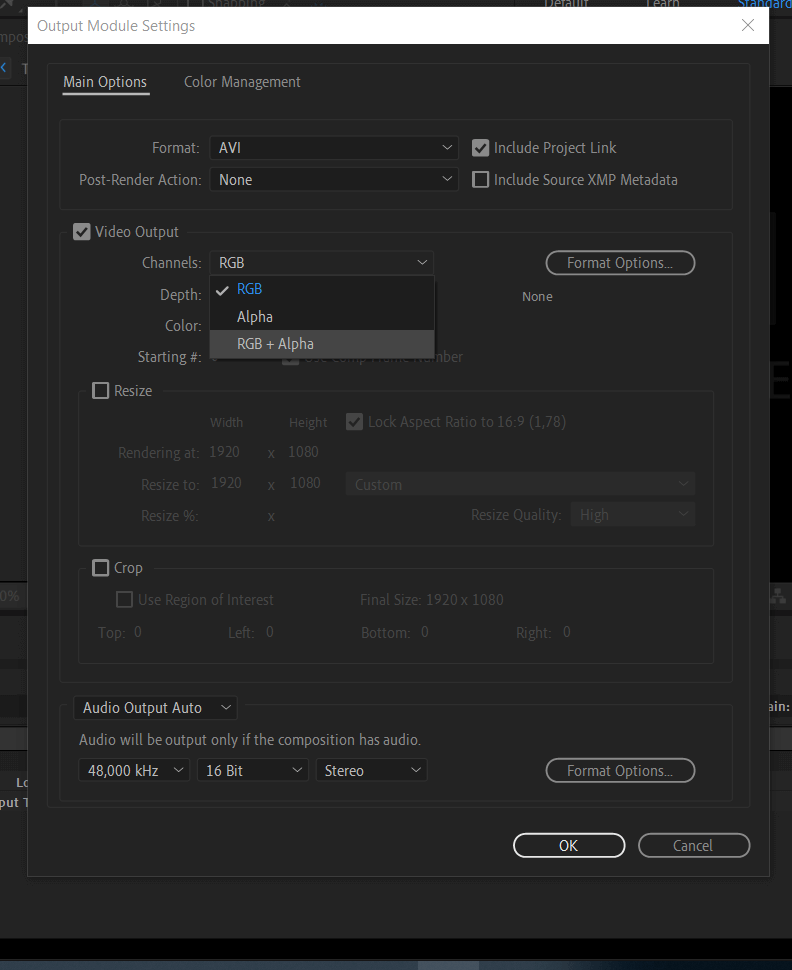
Remember that when working with Motion Graphics, it's usual to forget to change channels to RGB+Alpha in the Output Module, if you want the transparent channel in your video. That way, you can insert your animation in your timeline in Premiere Pro with just the logo/object and no background.

If you are more into shortcuts, you can find the full list here, with 361 shortcuts for After Effects.
